Cary Ballet Company Spring Gala – Space & Tech Rehearsal – 13 March 2013
News of the day can make sleep, elusive. My remedy is revisiting some favorites, like this one. The digital image is medicine for my analog soul.
And thinking about it, at 3 AM, is part of a currently low priority background task running between my ears, a gestation period for writing a book about the Craft & Art of Photography. I aim to make it my task beginning next fall, and occupy me through the winter.
Like “Mac”, I’m an old dog in winter. Recently read an article about how young folk mistook the lack of a period at the end of sentence for a manager’s anger. And I still can’t begin an e-mail without “Dear”. And so it goes.
Today, I started to purchase a ticket for a Ballet Performance. After acquiescing to online, required hoop jumping, with an account creation, I discovered at “Checkout”, an additional 45%+ cost in “Fees”! Nah.
Tomorrow, I’ll try the same purchase at the venue’s Box Office, which states “No Online Fees”. We’ll see. Old Dogs have time to sniff about.
Disclaimer: There’s other old guy stuff to attend to in Raleigh. Yes, I’m old.
Goin’ to Carolina, it won’t be long and I’ll be there
Disclaimer: The previous post is a predicate to making any sense of this one.
It was December in 1998. Driving on I-77, from northern Ohio to my new job with IBM in Research Triangle Park. I was excited and hopeful.
Ohio was my cradle, where I achieved escape velocity with a Navy Enlistment. And returned to, seeking refuge from a typically poor, youthful marital decision. And left, following the death of both my and my wife’s parents.
North Carolina was my choice. Oxygen for the spirit. As Mary Oates Spratt Van Landingham described it on 6 Mar. 1900: “A Vale of Humility between Two Mountains of Conceit”, referring to North Carolina’s location between South Carolina and Virginia. I was far too familiar with South Carolina.
Twenty five plus years later, I’m at peace. Like at the Coda of a Ballet. As a Widower, the Pas de Deux is necessarily spiritual but still, genuine. I wish that was so for all.
Another excuse to get outdoors on a sunny, early spring day. Like today!
It was a Town of Cary sponsored “Kite Festival” at Bond Park. And I was surprised to get a request from “Our State” Magazine to run this -which they did – in the March 2014 issue. My first published photograph! Yeah, yeah, they had pages to fill.
Which doesn’t diminish my delight in being outdoors now, watching the top of a Long Leaf Pine, sway in a gentle breeze in a Carolina Blue sky.
The Allman Brothers explain in this freebie at the Internet Archive: “Blue Sky”
It was an excuse to get outdoors on a sunny, early spring day. Like today!
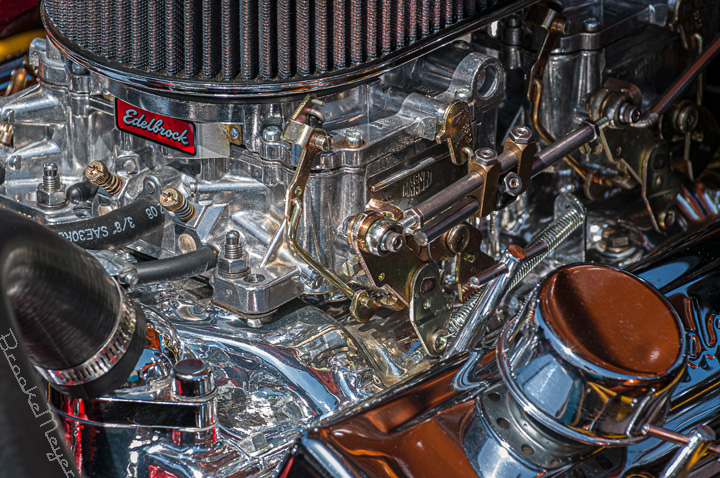
A car show. I think it was Don Bulluck Chevy in Rocky Mount. And I remember making this photograph. Had taught myself to be semi-competent with Manual Exposure! Probably, 2010.
And I remember this was in a Chevy Nova II. So ridiculously overpowered. The craft and care it took to build was clear for all to see.
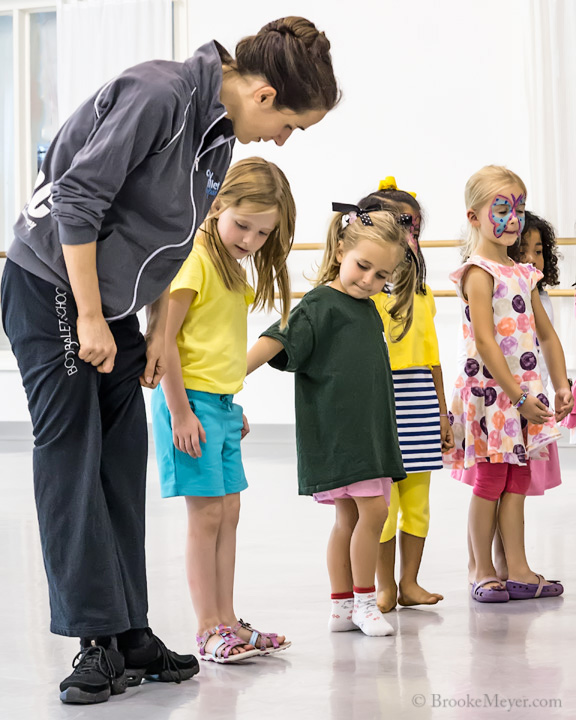
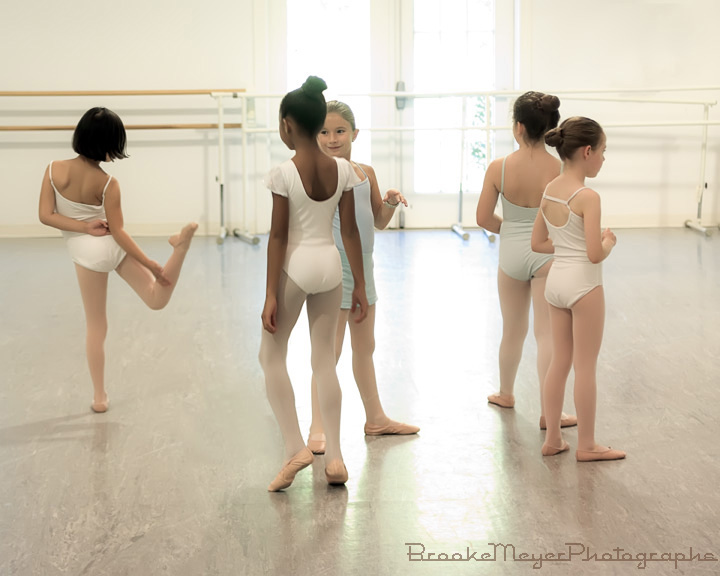
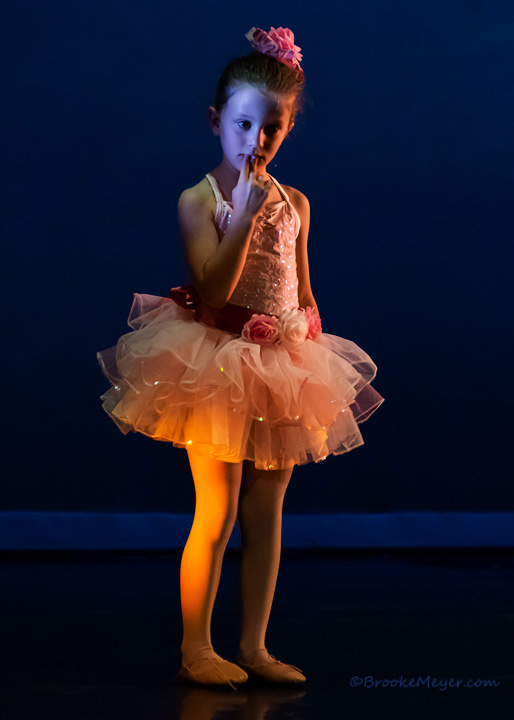
Cary Ballet – “Celebration Of Children In The Arts” Oct 2013
I was 100% ignorant of Ballet when I discovered Cary Ballet in 2010.
Deanna Seay, seen above, invited me to just come and watch her classes. And I thought “This is hard – really hard! Baseball and Basketball and Football is easy compared to this.” Then I surfed the Web-O-Sphere about her and discovered how much I didn’t know. She was very kind.
Reading the news, I wish this for young people. Not Hate, Hunger or War.
I was floundering in the Spring of 2010 after an earlier than planned exit from a corporate career (as Yogi so eloquently expressed, we “agreed different”). I was trying to figure out my place in the Sun. Got a Wake County “Certified Pool Operator” Certificate and earned a modest paycheck, running our HoA Pool that summer. But it was sort of a “Lady of Our Perpetual Responsibility” guilt avoidance – “Yes, I have a job.” Another I/T job would’ve had me in counseling.
Money wasn’t the immediate issue, we’d put away enough acorns in mast years to get along. The real issue was, I was 60, burned out on corporate I/T (IBM/Lenovo) and had no clue about where I’d lived for a dozen years. Life had been commuting on I-40 to RTP and conference calls. A highly paid bubble.
I’d been learning the craft of photography since a Parisian pickpocket boosted an obsolete Point&Shoot in 2007. That was my “justification” to buy a robust DSLR and a good, non-kit lens. The Art part or “Why” was latent (wife #1 did not want to be married to a Painter & Teacher). I was learning the Craft of Photography or the “How” part. Read the manual until I understood the tool. But I had zero clue how to make any kind of business from that.
Looking for kindred spirits, I joined Cary Photographic Artists. Which led me to a new, hyper-local, online publication where they advertised their Open Competition – “Cary Citizen”. Which led me to a coffee at La Farm with the Editor, Hal Goodtree, where I pitched me being a “Contributing Photographer”.
So armed with a legitimate Press/Media Pass, I asked to cover small events, with heart. It was a raison d’être to explore my community. And I’d have to figure out how to tell stories with photographs – no excuses.
The above photo is from my very first assignment at Kids Together Park “Fall Foliage Walk”, not five minutes from my house and which I didn’t know existed. I began to learn about where I lived. That was Saturday morning.
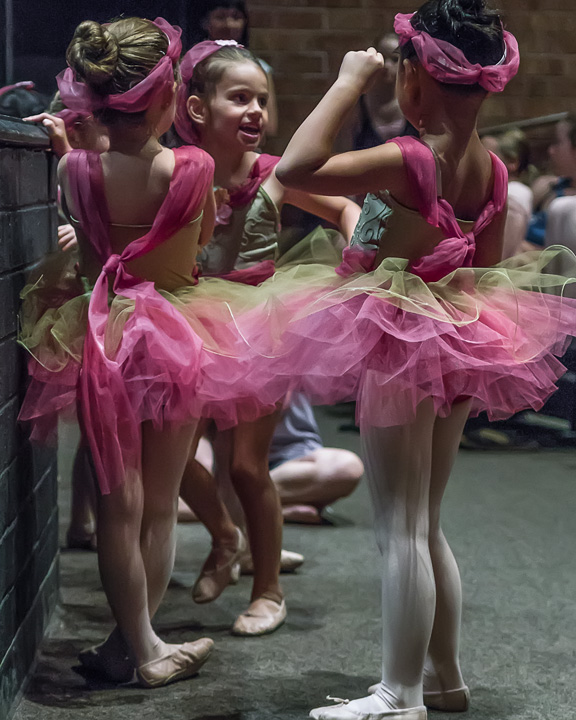
That afternoon was my second assignment, “Children’s Celebration of The Arts” at Cary Ballet Conservatory. Which I also didn’t know existed.
And there, I found what I was looking for. My photograph, below, had nothing to do with the event. And everything to do with the next dozen years.
Until I wore out. But it’s a really good worn out.
With some hours before the irresistible hoopla of the Super Bowl and desirous of no more examples of inhumanity in the global news, I surfed over to a camera forum dedicated to the brand I used in all my work.
A poster asked for help with the abysmal results he got from a newly purchased, expensive camera featuring the latest auto focus automation – in this case for birds (it’s always birds). It hit a nerve about a relatively recent eBay sale and the fallacious belief that automation will trump understanding and skill.
I made this 13 years ago, with #3 of 12 DSLRs I’ve used since. Hardly current technology.
The technique is straightforward. Reassign Focus from the Shutter button to a button on the back of the camera aka “Back Button Focus” – it’s free! Yes, it does require (horrors) reading a page of the manual. Or watch a You Tube video.
Set the focus function to “Continuous” (mfrs call it different names but it’s still a Rose). Leave it with a single center point . Then point at what you want in focus while holding the rear button with your thumb and track it. Mash the shutter button when you see what you want. Disclaimer: 60 to 80 K of Dancer images per year may result in a callous on your thumb.
Static subject, on a tripod? Just release the back button. Or change the focus mode to “Single”.
Back to eBay. I honestly listed a “Bargain” condition camera body with the real shutter count, some 6OK shy of the mfr. rating. A guy bought it and two hours after he picked it up, e-mailed me it was no good, couldn’t focus on birds in flight. I had set it to mfr defaults. But I’m pretty sure he didn’t read any of the manual.
I immediately refunded his purchase, realizing any explanation was pointless. He did return it. Kept it and another copy, as my retirement gear. Haven’t experienced any issues.
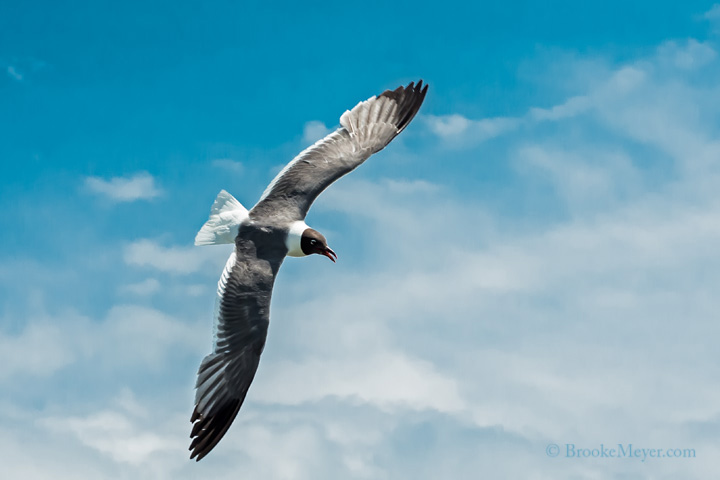
As for the birds, this from camera either #6 or #7 (always kept two of the same model), in 2014
Fort Sumter, Charleston, South Carolina – 16 July 2014
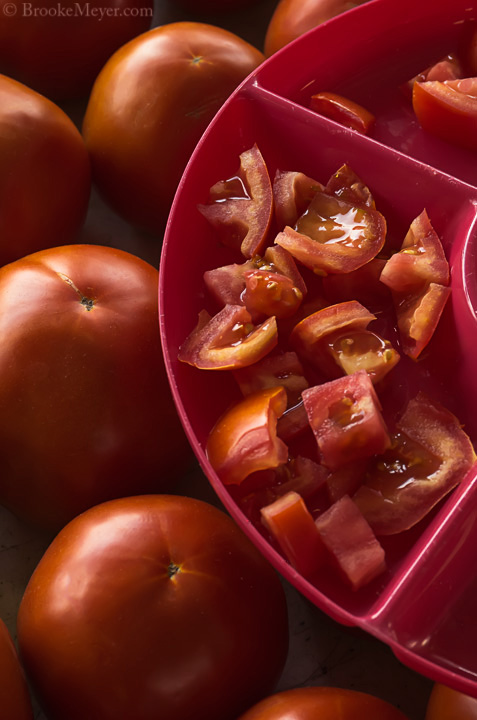
My head cold is about done and the lack of discomfort allowed some restorative sleep. There is however, a different view of life after 3 days of misery. Which brings me back to a You Tube video I stumbled upon in the web-o-sphere, made by some fellow Wake County, NC residents: Summer In The South. It was the tomato sandwich that got me.
The only way to make a tomato sandwich, besides some big ripe slices of tomato, is with Duke’s Mayonnaise. Just accept that. I do use Arnold’s Whole Grain Bread but that’s optional. I don’t do White Bread – too White.
So feeling better and post ‘mater sandwich, I read all of the news of the day, accompanied by some room temperature Bourbon and beer. Amused by Wash., D.C and dismayed by pretty much everywhere else, I realized that my intended evening menu was not desirable. And then – aha!.
So when you don’t feel like cooking but need to eat something good and good for you, Duke’s to the rescue! An ample tablespoon or two, doused in fresh squeezed lemon juice (use you hands, they’ll smell good) and a good dose of Old Bay (Disclaimer – I use Old Bay a lot)! Stir that up and break out the celery stalks. Dried ends go into the freezer scrap bag for stock, the rest you dip and eat. A workingman’s Bordeaux and some chocolate after and you’re good!
As I explained to some folks yesterday, some images stay in memory. This is one. This week, on my almost daily walk, I saw the shadow of a large wing span. Looking up, I expected to see a Vulture, properly attending a recently departed neighborhood Squirrel. It was, in glorious surprise, a Great Blue Heron, who with astonishing wingspan, navigated between two houses into the ravine behind that begins Clemmons Educational State Forest . And I wondered how it survived the fertilizer and pesticides of the Golf Course behind it. Like finding a Rose in Snow, despite the Plows and Salt.
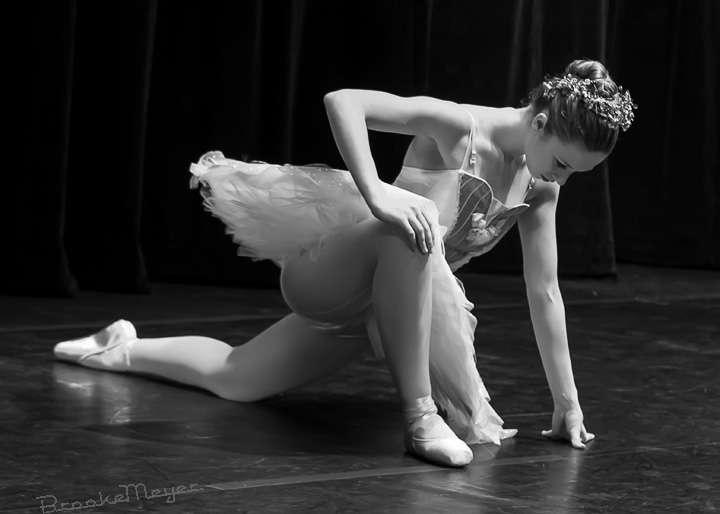
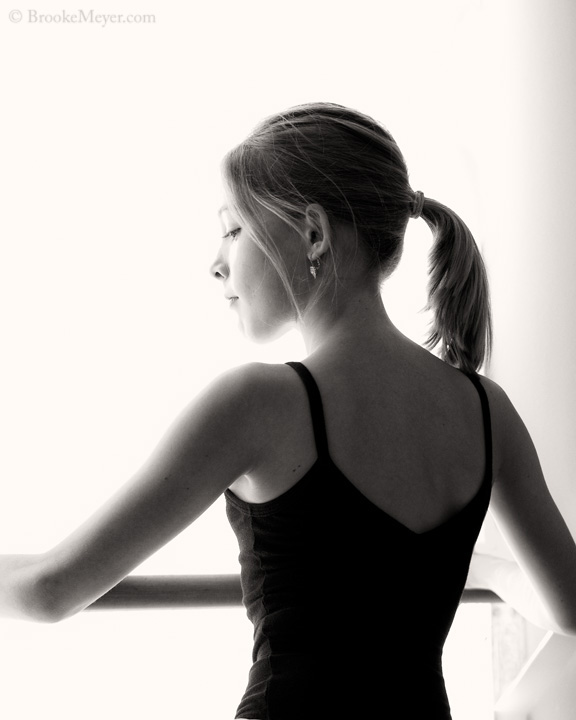
I started writing about photography recently mostly to help some friends and students understand some principles of the Craft. That part is the “How”. Gaining that knowledge gives you a chance at the other part, the “Why” or Art. I was going to write about making this image. About why it’s important to learn and understand lighting, composition and posing. All those things are important but still, mostly craft. After staring at this blank narrative for a long time, I realized everything I had to say was in the photograph. The key is something no camera can provide. Universally, every dancer I’ve met, from high school students to principals in major companies, said the performance on stage, those few minutes of a lifetime, make it all worth it. It is, the moment, the clarity, the poetry, the magic of the best expression of ourselves, creating something that transcends the mortal and the specific. Which is why, as an artist, the few minutes of my lifetime it took to make this portrait are worth the years it took to reach them. The proof print of this image is much richer than any electronic display. That image, that moment, I hope her children will share.
Senior Portrait Session, Cary Ballet Conservatory, April 2015
Last week, Monday through Sunday, I photographed the dress rehearsals and performances of “Anastasia”, a production of the Ballet and Jazz Companies of the Cary Ballet Conservatory. 21+ hours of rehearsals and 5 performances with 300 plus dancers in each. This was made before the first rehearsal